|
Landscape fabric is a valuable material that you should consider using in your garden. However, if you are unfamiliar with landscape fabric, you’re likely unaware of how and when to use it. This article will teach you when to use landscape fabric in your yard and give some insights as to why landscape fabric is so useful.
What is Landscape Fabric? Before we discuss specific landscape fabric uses, let’s ensure that you understand precisely what landscape fabric is. Landscape fabric is a thin sheet typically made of geotextile materials. Landscape fabric is commonly available in garden supply stores and has multiple uses in the landscape, as you’ll soon learn. Using Landscape Fabric to Suppress Weeds in Garden Beds The primary instance in which it is beneficial to use landscape fabric is when you want to suppress weeds in a garden bed. The benefit of landscape fabric, in this case, is that it prevents sunlight from reaching any weeds that may be germinating in your beds. While landscape fabric blocks sunlight, it simultaneously allows air and water to pass through its permeable material. This permeable nature ensures that the plants you want to grow in your garden bed continue to receive the water and air that they need to survive. All the while, the unwanted weeds in your garden bed will have a much more difficult time developing. Using Landscape Fabric When Constructing a Patio While weed suppression in a garden bed is the main way to use landscape fabric, this material is also useful when constructing patios. As is true of garden beds, a dry-laid patio can also experience weed problems as unwanted plants grow from below the patio up through the gaps between your pavers. Adding a layer of landscape fabric below your patio during the construction phase is an excellent way to suppress those weeds. That added layer will help keep your patio looking neat and clean while the weeds below fail to grow. Using Landscape Fabric When Building a Retaining Wall A properly built small-scale retaining wall should have gravel or crushed stone behind it to ensure that water can flow freely through it. However, without landscape fabric, the soil adjacent to the gravel will eventually fill the gaps between the crushed stone, preventing water from flowing freely, which can lead to structural failure. Placing landscape fabric between the crushed stone and the soil prevents this issue from taking place. By ensuring proper water flow, this use of landscape fabric will help ensure that your retaining wall remains intact for years to come. Does Your Yard Need Landscape Fabric? Now that you know when to use landscape fabric, you may be eager to include some in your next garden project. As is always the case, it can be quite helpful to hire a professional team to install your landscape fabric properly. At All Outdoors, we’re ready to provide landscape fabric and much more. Reach out to us today at 864.275.2039 to learn more. 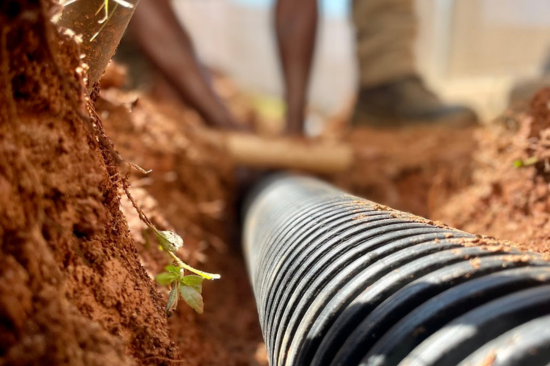 French drains and catch basins are two common components of landscape drainage systems. But despite both these options being popular, each one comes with a unique list of pros and cons. To help you decide which of these drainage structures is ideal for your yard, we’ve detailed the main advantages and disadvantages of each. Advantages of a French Drain There are plenty of advantages to installing a French drain in your yard. French Drains Are Perfect for Dealing with Sub-Surface Water Not all the water you must manage on your property is above ground. In fact, there is plenty of water that flows below the surface of the soil. Since french drains are long, linear structures that include pipes and drainage materials that exist underground, they are a fantastic option for dealing with subsurface runoff. French Drains Help Prevent Structural Damage The ability of french drains to channel subsurface water allows them to help preserve the structural integrity of foundations, driveways, retaining walls, and many other structures. As such, installing a french drain can help you avoid some costly property damage. French Drains Tend to Require Less Maintenance While the maintenance requirements of different drainage solutions can vary case-by-case, french drains generally require little to no maintenance compared to catch basins. In most cases, you won’t need to tend to your french drain very often after a successful installation. French Drains Are More Subtle In many cases, french drains have less of a visual impact on your property than catch basins do. In fact, you can plant grass directly above your french drain so that it is not easily visible at all. Disadvantages of a French Drain While there are plenty of good reasons to install a french drain, there are disadvantages as well, two of which we have described below. French Drains Are Often More Expensive to InstallCost specifics will vary from project to project. However, in most cases, french drains end up being more expensive to install than other drainage solutions. Additionally, the longer your french drain is, the more you can expect to pay when installing it. French Drains Can Be Difficult to Unclog Although french drains don’t require a lot of consistent maintenance, the maintenance they do occasionally require is difficult to complete. This is especially true regarding clogs. 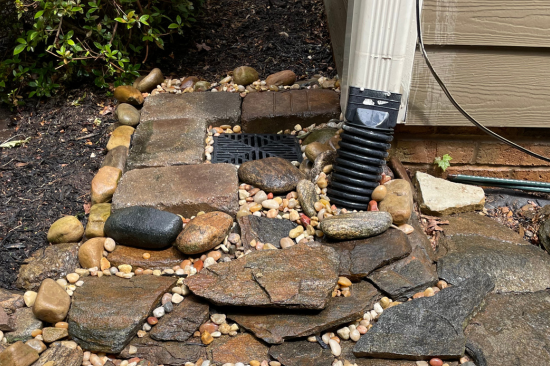 Advantages of a Catch Basin
Catch Basins Are Great for Managing Standing Water If you notice that your yard has a lot of standing water, regardless of the cause, installing a catch basin is a wise choice. Catch basins can quickly eliminate any pooling water that stagnates on the surface of your landscape. Catch Basins Are Excellent for Yards with Low PointsSome properties have natural low points that accumulate large pools of water during rain events. Placing a catch basin directly at that low point can eliminate that pooling issue. Catch Basins Installation Can Be Less Expensive It’s difficult to estimate the exact cost of installing a catch basin. However, installing a catch basin is often slightly less expensive than installing a french drain. Catch Basins Also Capture DebrisCatch basins do not only capture rainwater, but they also do a good job of collecting any trash or debris that may be floating in that rainwater. Disadvantages of a Catch Basin No drainage solution is perfect. Here are two cons to catch basins you should keep in mind. Catch Basins Can Attract Insects As the name implies, catch basins capture and hold water in a reservoir below the ground. Naturally, this standing water can become a breeding ground for unwanted insects. Catch Basins Can Cause Sink HolesWhen a catch basin fails, the results can be disastrous. In fact, if a part of a catch basin collapses, it can create a sinkhole in your yard that will be difficult to remedy. Conclusion Both French drains and catch basins are excellent options when you need to manage drainage on your property. However, each of these options has a specific list of benefits and challenges. To ensure you choose the best option for your property, discuss this topic with an expert, feel free to reach out to All Outdoors at 864.275.2039 today! Everything You Should Know About Ground Bees
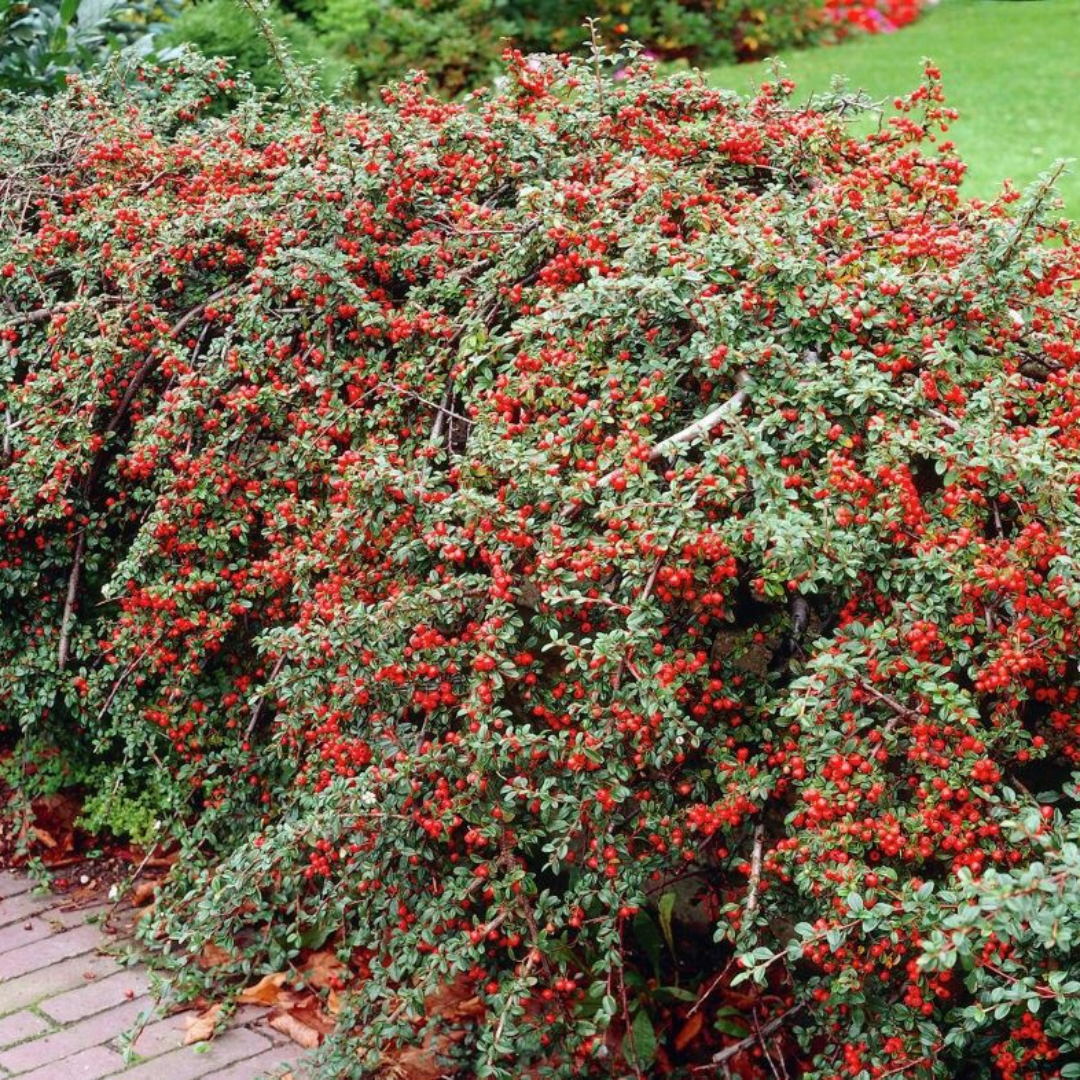
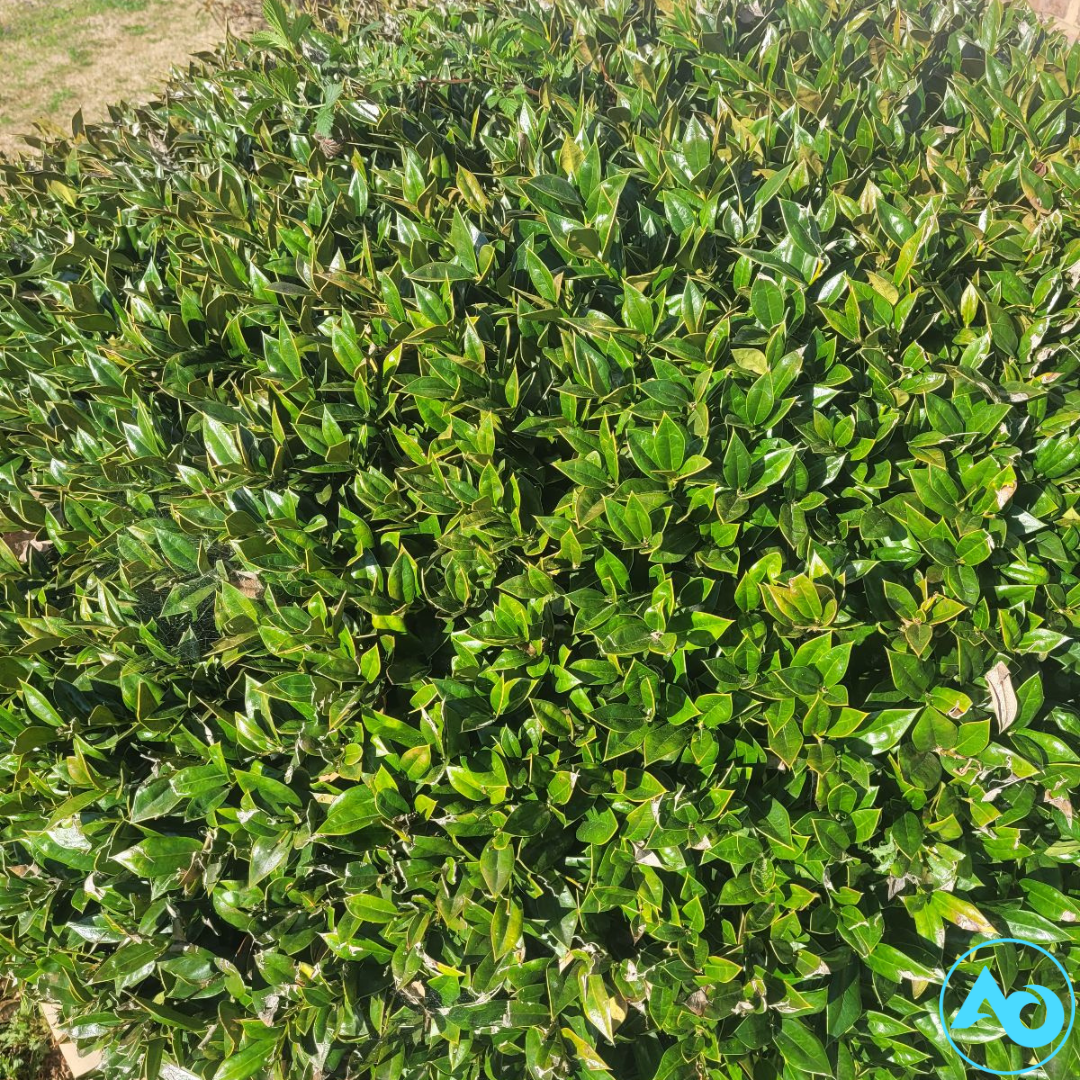
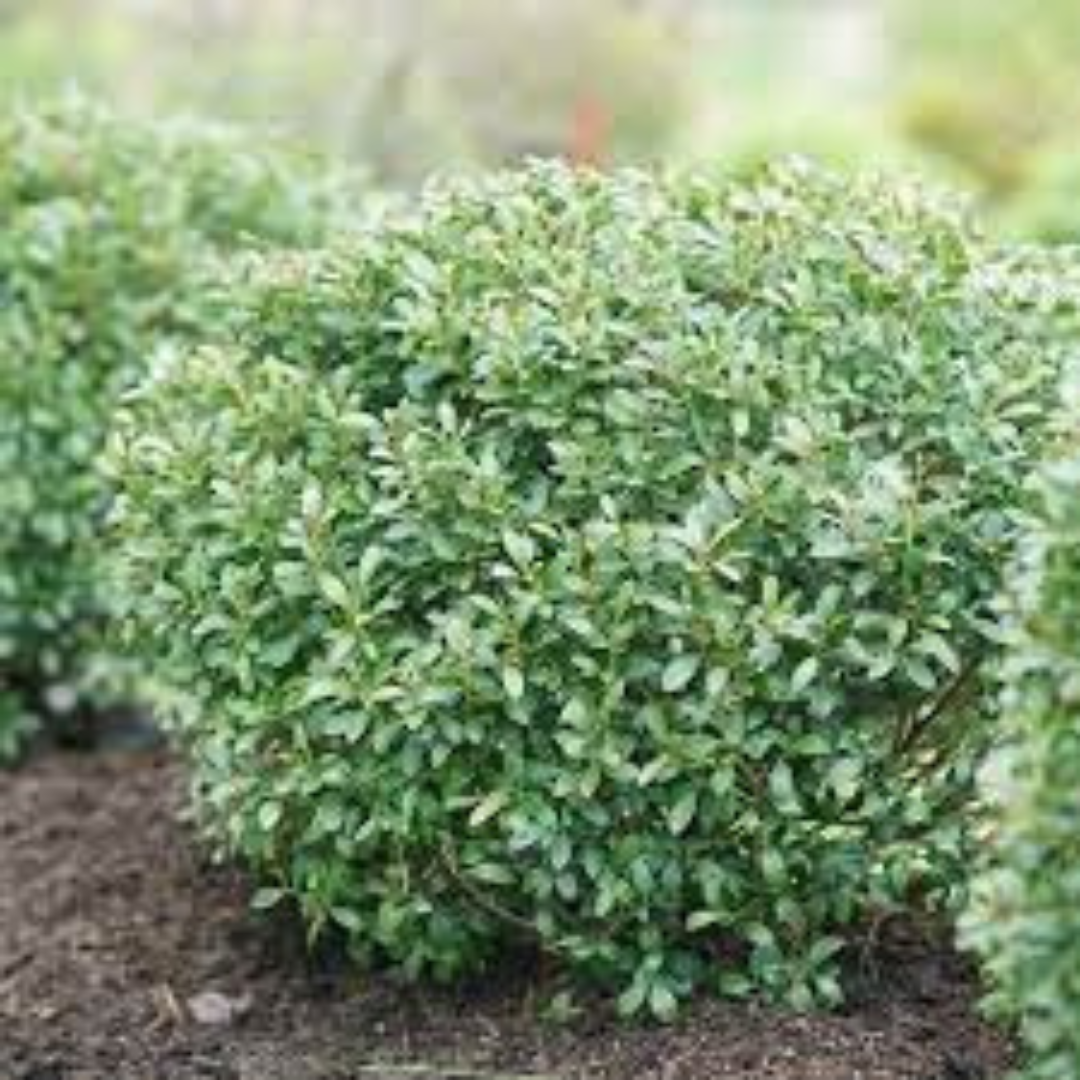
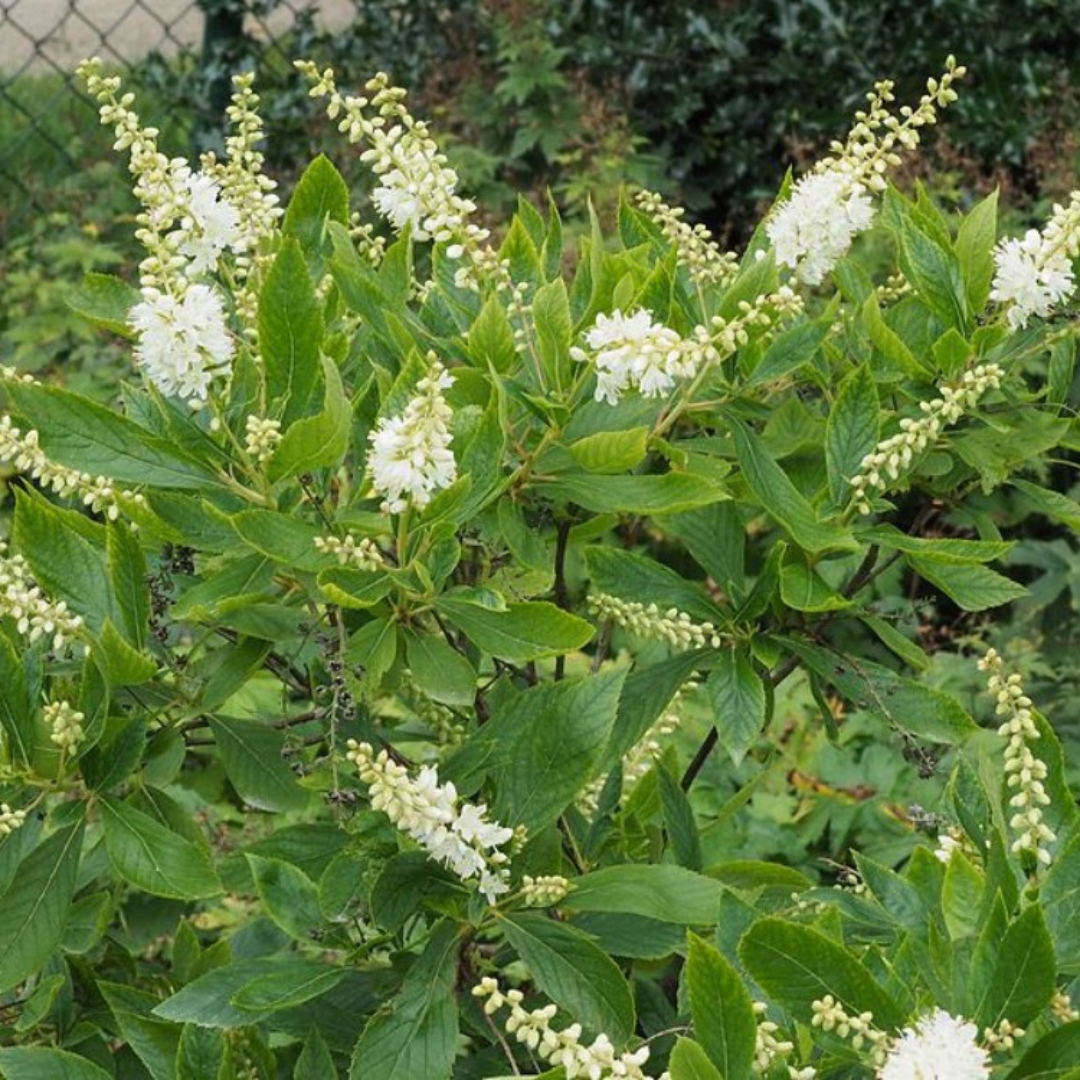
Most people are concerned when they find insects living in their lawns or garden beds. However, not all ground-dwelling insects are pests that you should eliminate by default. Such is the case with ground bees. Despite being somewhat common, ground bees are often poorly understood within the homeowner community. If you are interested in educating yourself about these interesting and environmentally important creatures, you’ve come to the right place. This article will teach you everything you need to know about ground bees by answering five of the most common questions. What Are Ground Bees? The term “ground bees” can refer to one of several bee species, all of which burrow into the ground to create their nests. At times, people also refer to these bees by the names “ground nesting bees” or “miner bees,” both of which reference the way these bees make their homes in the soil. Unlike many other types of bees, ground bee species don’t form hives and typically don’t live in large groups. Instead, ground bees tend to be solitary, meaning that each ground bee hole will be home to an individual ground bee. When Are Ground Bees Active? Most ground bee species are active during early and mid-spring, during which time they are focused on reproduction. This main period of activity usually lasts for about six weeks before the adult bees die. During the rest of the year, ground bee larvae will remain below the ground, developing into adult bees that will reemerge from the soil next spring to recommence the life cycle. Are Ground Bees Dangerous? Overall, ground bees pose very little danger to you and your family. Although female ground bees can have stingers, they are usually very calm creatures that will not go out of their way to sting anyone. Alternatively, male ground bees can be a bit more aggressive. However, male ground bees do not have stingers, which makes their aggression essentially harmless. How Can You Tell if You Have Ground Bees on Your Property? If you know what to look for, you’ll be able to tell right away if your property has ground bees. Ground bee nests are easy to spot, as they can be about a ¼ inch in diameter. Each hole often has a small pile of soil around it. These nests can be somewhat of an eyesore, but are valuable to the environment in your yard. Should You Get Rid of Ground Bees in Your Yard? Many people are quick to assume that they should get rid of any ground bees that appear in their yards. However, it’s wisest to allow ground bees to survive. Ground bees are responsible for pollinating a wide range of spring blooming plants, which makes them an essential component of your local ecosystem. Considering the short lifespan of an adult ground bee and its positive environmental impact, the benefits of allowing ground bees to survive far outweigh the small nuisance that their presence can cause. While many people love the sight of beautiful shrubbery, but few owners are keen on keeping up with the maintenance that these plants require. Thankfully, there are plenty of shrub species that require very little maintenance and minimal watering as well. This article will introduce you to ten of the best low-maintenance shrubs that you can grow in your yard. These are in alphabetical order.
A Few Shrub Maintenance BasicsThe ten shrub options we listed above do not require much maintenance each year. However, all shrubs will need some form of care, even if it is minimal. To help you give your shrubs the support they need to perform well, here are a few shrub maintenance basics that you should know:
 What is Garden Bed Redefining, and How Does it Work?
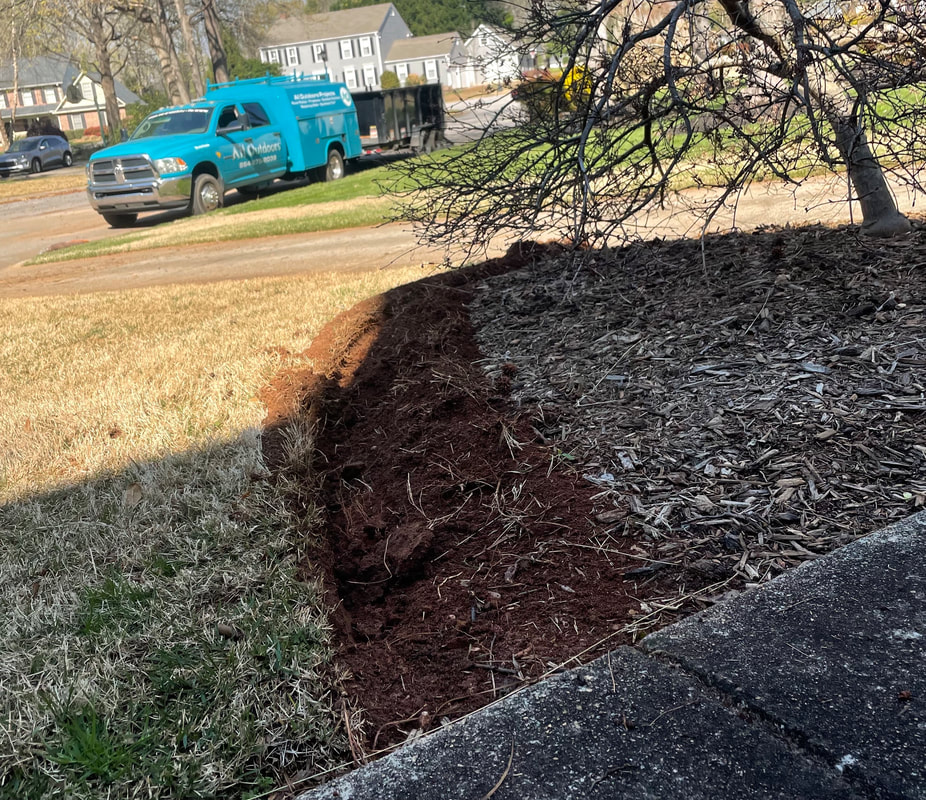
Plant bed redefining is a gardening task that professional landscapers know well. However, there are many beginner and intermediate gardeners who are not familiar with what garden bed redefining is or why it is worth doing. This post will give you insights into what bed redefining is and how it works. Bed Redefining: A Simple Definition Bed redefining is a process in which you use a shovel, edger, or such as electric and gas-powered bed redefinerl to cut a distinct edge around your garden bed. This task is most relevant when your garden bed borders a lawn area. Typically, redefining involves cutting into the lawn to create a clear and crisp outline defining where your bed ends and where your lawn space begins. What Are the Advantages of Bed Redefining? Since redefining a garden bed can require some hard work, you might be wondering why this job is worth doing. But as the list below shows, there are several advantages to bed redefining that you may not be aware of: A professional appearance: Redefining your beds is a subtle way to give your garden a more professional look. Well-defined edges make your garden look neat, orderly, and attractive. Less grass growing into your beds: It’s always annoying to find that your lawn has grown into your garden beds where it does not belong. Redefining a bed edge cuts your lawn’s roots, making it much more difficult for it to expand into your bed. While this approach is not effective 100% of the time, it can do a lot to keep your grass growing in its designated area. Lower cost than other edging options: There are other ways to edge a garden bed, including by lining the bed with stone, pavers, or metal edging materials. However, while these options are more long-lasting, they are also considerably more expensive. Clearly, redefining the edges of your garden beds has both aesthetic and functional benefits. Reach out to our team to find out if bed resigning is right for your yard. Call Now 864.275.2039 A tasteful selection of shrubs growing in your foundation bed can do wonders for the overall curb appeal of your home. However, selecting shrubs for a foundation planting plan is not a one size fits all process. Instead, you should choose foundation shrubs based on the unique characteristics of your house. The next few sections will give you a better idea of how to do that.
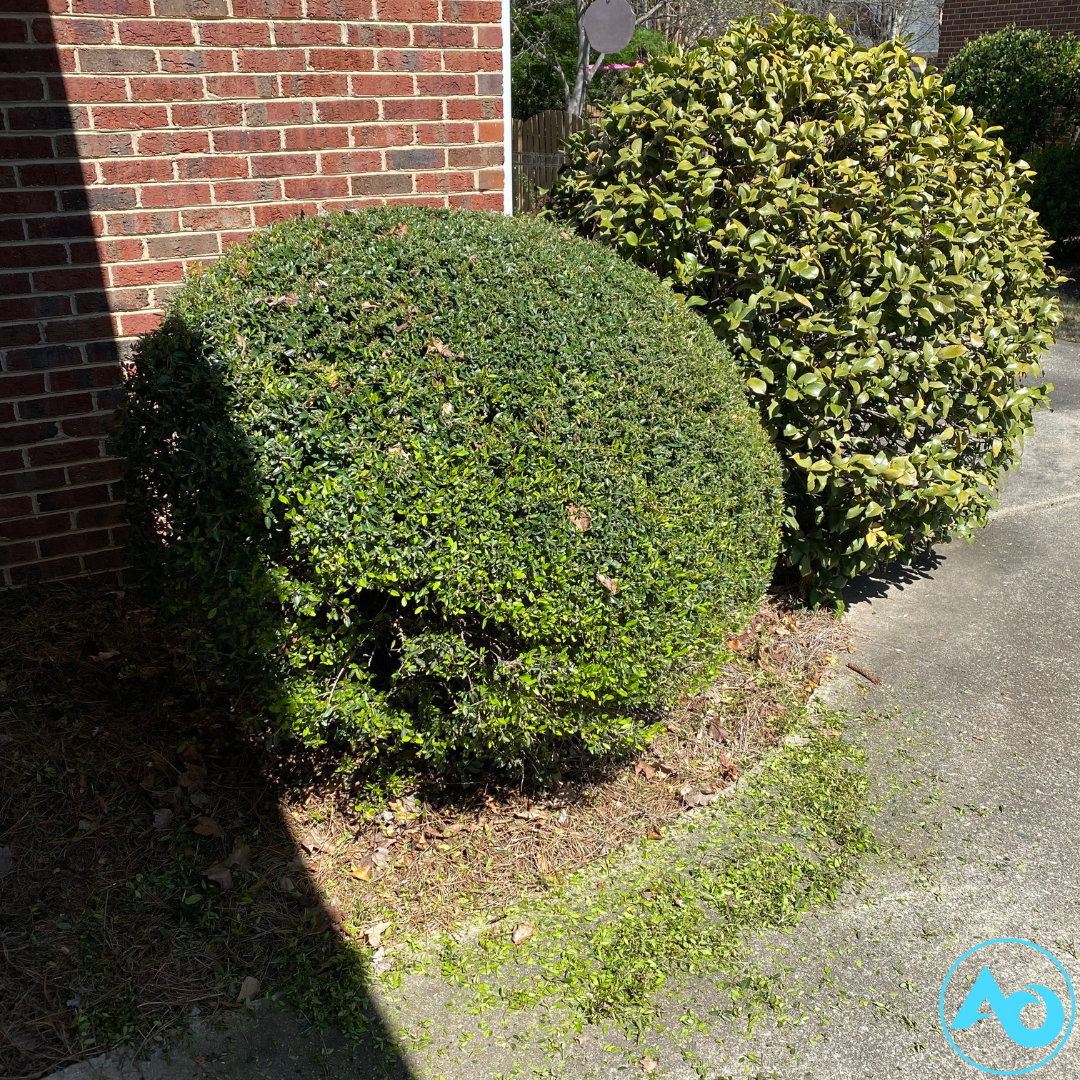
Choosing Shrubs for One-Story Houses The shrubs you should plant for a one-story or smaller house are generally different than those you would pick for a larger or multi-story house. For example, if you have a one-story house, it’s usually best to select shrubs that are on the smaller side. As larger shrubs mature, they will appear out of proportion compared to a one-story house. This can cause your home to look smaller than it actually is, and it can allow your shrubs to appear overgrown and out of place. On the other hand, shrubs that remain small are more likely to complement the size and proportion of your home’s front façade. Shrub species that reach anywhere from two to six feet tall should work well in those situations. Choosing Shrubs for Houses with Multiple Stories If you have a larger home with multiple stories, you have a greater opportunity to incorporate both large and small shrubs into your foundation planting scheme. However, it is still vital to consider the placement of these shrubs. For example, you should situate larger shrubs at the corners of your home or between windows. Large shrubs that grow directly in front of a window will quickly block the view out as they expand each growing season. On the other hand, it is often permissible to plant smaller shrubs directly below a window as they are far less likely to obscure the view. When choosing larger shrubs, it is also sensible to consider the plant’s overall form. If you wish to place a larger shrub between windows, it’s better to use one that has a narrower form than one that is more rounded. Likewise, it’s often better to select shrubs that grow more horizontally than vertically for areas directly below windows. Matching Shrubs to the Style of Your Home Sizing is not the only factor you need to consider when choosing shrubs for your foundation bed. It is also important to choose shrubs that will match the exterior appearance of your home. Consider the colors and textures of your home’s façade. Then, select shrubs that have complementary colors and textures. Matching shrubs to the style of your home can require an artistic eye. However, don’t forget that what matters most is your opinion. After finding a set of shrubs that are the right size for your house, you can narrow down your selection to the ones that have the flowers and foliage that you think looks best. A Few Popular Shrubs for Foundation Planting Beds Now that you understand the basics of how to choose shrubs for a foundation bed let’s consider a few popular options. Below are some of the most commonly used shrubs for foundation beds:
 Picture this: you have just built your dream home in South Carolina and would like to create a lush and full lawn. You have heard stories about the challenges of growing grass in our clay based soil and hot sun. You are probably asking yourself, “What type of grass is best to be planted in South Carolina?” This is an important question to answer in order to choose the most appropriate grass seed for your specific situation. Here we will go over a few types of grass and which conditions they are best suited for.
Consider Your Needs When asking yourself what type of grass is best to be planted in South Carolina, you must consider your individual needs and the conditions in which you will be trying to grow the grass. Certain types of grass may require more water, more trimming and maintenance, or a certain soil type to perform to the best of their ability. Before deciding which seed to buy, spend some time evaluating what type of maintenance schedule you will be able to commit to. Take into consideration whether you would like to install irrigation, check out how much sun your yard gets during the day, and if possible, have your soil tested. Types of Grass to Plant in South Carolina Below are some grasses that are well suited for the climate and soil conditions of South Carolina. Zoysia-Zoysia is a hardy, warm-season grass that grows in a wide range of conditions. It is tolerant of both sun and partial shade, and it will handle poor soils that may be found in the coastal areas of the state. Being a warm-season grass, this type will flourish and look great during the hot and dry periods of the summer. That said, it is quite tolerant of cooler temperatures as well, making it an excellent choice for upstate South Carolina. If you would like to avoid installing irrigation, Zoysia’s drought resistance may make it a good candidate. Zoysia will need regular mowing and de-thatching to maintain a healthy growth habit. Fescue-Another versatile grass is fescue. It is a cool- season grass but can survive in the heat of the summer if provided with adequate irrigation. It is also tolerant of poor soil conditions and is a great choice for a shady yard. Despite being fairly heat tolerant for cool-season grass, it can be delicate during extremely hot and dry summers, and reseeding annually in the fall will prevent your lawn from becoming patchy. Bermuda-Bermuda is a heat tolerant and very hardy grass. It is highly drought resistant and will continue looking its best throughout the hottest parts of the summer. It is a quick grower and will reward even the busiest homeowner with a lush lawn. One condition that Bermuda grass will not tolerate is shade. That said, its tolerance of hot sun and little water will make it a great choice for most environments found in South Carolina. Bermuda will require a stricter fertilization routine compared to others. Due to its quick growth, regular mowing will be a necessity. Centipede-Centipede is another warm-season grass that does well in the hot summer sun. It will tolerate drought conditions and is well suited for southern and coastal areas of the state. That said, centipede will be a little more tender to cool temperatures and may not be the best choice for upstate. In the right conditions, it will be quite low maintenance, not requiring much in the way of fertilization. Which is the best grass for you? These are just a few options to consider, there are many hybrids of each which have been bred to fulfill specific needs presented in certain conditions. If you are having trouble deciding, consider asking a local landscaper for their take on what type of grass is best to be planted in South Carolina. They deal with the conditions and the different types every day, and they may be able to provide valuable insight. 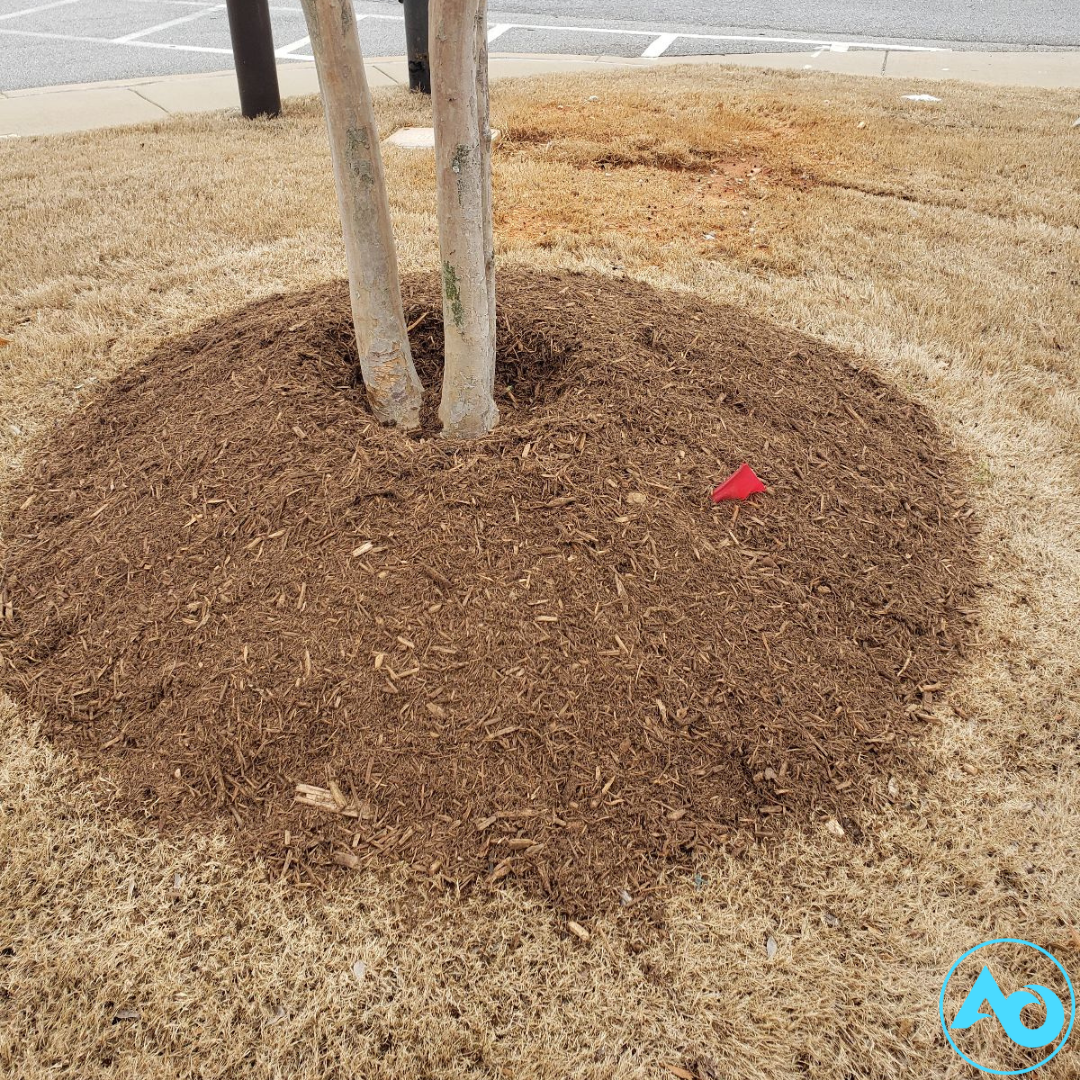 As homeowners who take pride in our landscapes, we naturally want to do what is best for the plants that inhabit them. One piece of advice that is often repeated is not to mulch right up to the base of a shrub. In search of a deeper understanding, you may ask yourself, “Why is the mounding of mulch along the base of shrubs harmful?” There are a few important reasons why this practice is not recommended.
Will it really harm my shrubs? The answer to this is yes, mulching right up to the base of a shrub is harmful and will eventually cause a decline in the health of the plant. Factors such as oxygen deprivation, water retention, and root growth are responsible for this being a bad practice. Why is the mounding of mulch along the base of shrubs harmful? Mulch is very effective at retaining water and keeping weeds down. An even layer (3” maximum) is beneficial to the main root mass of a shrub for these reasons. However, this tendency to retain water may cause problems when mulch is mounded against the base of a shrub. Excess Water Retention-Since mulch exhibits great water retention properties, the inside of a mound of mulch may not dry out in between rain, irrigation, or other waterings. This causes a perfect environment for weakening the protective layers of bark at the base of the shrub. The base of the shrub needs to have access to oxygen, and a waterlogged mound of mulch against the base will reduce the amount that is accessible to the plant. Disease-Many disease-causing bacteria and fungus can thrive in a moist environment. When the base of the shrub is encapsulated in this soggy mound for long enough, the protective layers of bark may die back. This will leave the plant susceptible to all of the bacteria, fungus, and insects that may have been thriving within the mound of mulch. Excess Root Development-As stated earlier, mounding of mulch against the base of a shrub is harmful in part due to the decreased availability of oxygen. One side effect of this is the base of the shrub sending roots into the pile of mulch, seeking a proper environment for the intake of oxygen. A tell-tale sign of over mulching is a mass of these roots formed at the bottom of a shrub. What’s worse, is that when a shrub forms these roots and then the mulch-mounding practice is corrected, these roots will die off which will harm the overall health of the tree. Avoid Killing your Shrubs and Plants For the health of your beloved shrubs, avoid mounding mulch at all costs. Mounding of mulch along the base of shrubs is harmful to the plant, and will contribute to its decline and ultimately its death. A good rule is to leave a few inches of space between the base of the shrub and the layer of mulch. This will ensure that the base of the shrub is able to perform its duties in balancing the oxygen and moisture intake of the plant. Hiring an expert to help maintain and improve your yard can help you avoid small but lasting mistakes such as mulch mounding. If you have invested in your yard and want to be in safe hands, we can help you keep it as healthy and beautiful as possible! Call Today so we can properly prepare your yard for spring! 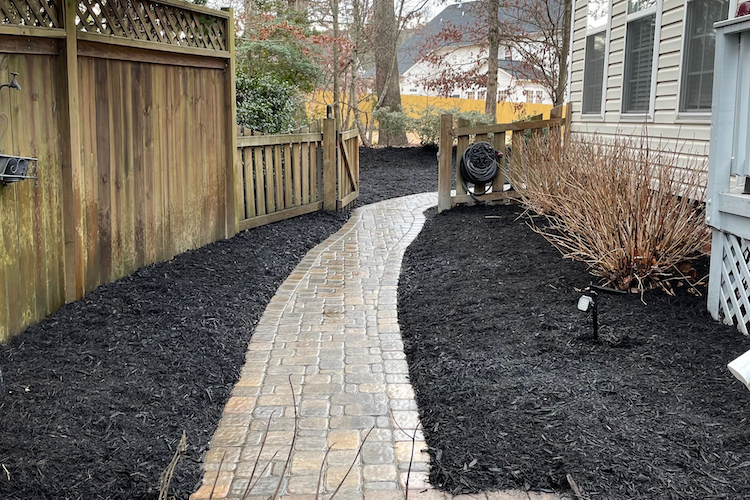 If you have garden beds on your property, you are likely familiar with the use of mulch in some way or another. A layer of mulch can have several benefits for your soil and plants. These include keeping weeds down, aiding in water retention, and adding an element of visual appeal to your property. Perhaps you have already added mulch to your beds for one of these reasons. If so, you may eventually ask yourself this question: How long will mulch last? The answers can vary depending on the type of mulch, climate, and other factors. That said, it is recommended that homeowners renew the mulch in their beds about once a year.
Factors influencing longevity of mulch As previously mentioned, many factors can come into play when trying to determine how long mulch will last. Let’s examine these: Type- Mulch comes in many varieties, and some last longer than others. Bark mulch will last longer than shredded mulch, as the bark is the tree’s natural protective shell. Shredded mulch contains the inner portions of the tree and will break down more readily. Climate-Your local climate can affect the mulch layer in several ways. An area that experiences frequent heavy rains may present a challenge for keeping the mulch in the bed. This will also be affected by the topography of the bed. On the other hand, an unshaded bed that is constantly baking in the hot sun can require more frequent mulching, as the sun speeds up the natural processes that break down the mulch. Landscaping Practices-Another factor that may play a role in how long mulch will last is the care used in regular bed maintenance. When trimming, weeding, raking, and cleaning up, you will want to leave as much mulch in place as possible. Mulch that ends up with trimmings or weeds in the compost pile is money down the drain. Getting the most out of your mulch How long your mulch will last will come down to the environmental factors at play as well as your own habits in maintaining and protecting your mulch layer. A well-maintained bed with proper watering and landscaping practices will keep your mulch layer in great shape for at least a year. A regular practice of replacing the old mulch each spring will keep your garden beds healthy and beautiful throughout the growing season. This will help keep weeds out and water in. Some may prefer to change the mulch twice a year, using two thin layers of mulch as opposed to one thick layer. This can be a great idea. First, you will be renewing the beauty of the bed in the spring, while adding a fresh weed barrier to endure the growing season. Second, renewing the mulch layer again in the fall can protect your dormant plants from extreme temperatures. This will also help prevent the mulch from breaking down, as there will be newer mulch more often. Last Thoughts When considering how long your mulch will last, many of the influencing factors can be controlled by you. There is no one size fits all answer, but there are ways that you can get the most out of your mulch layer. A great landscaping team can steer you in the right direction, while considering your specific needs. 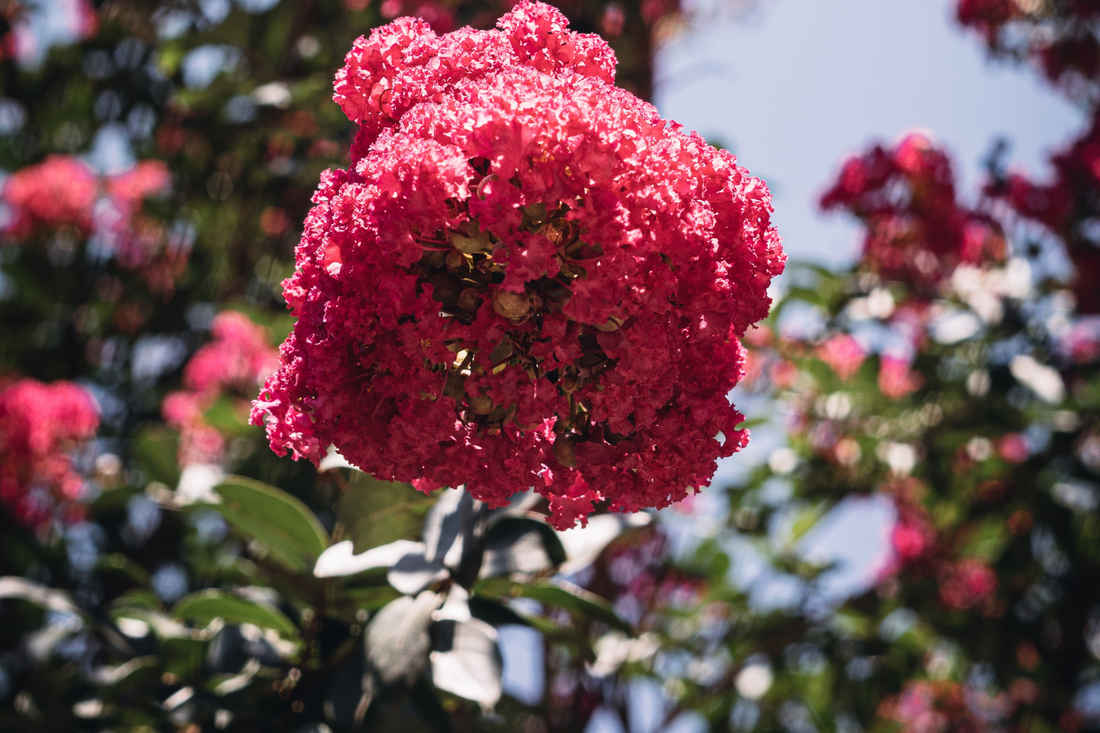 Pruning a crape myrtle without causing its death is easier said than done. However, with the right insights, your pruning efforts will help your crape myrtle be as healthy and beautiful as possible. This post will share the essential tips you should remember while pruning these lovely trees.
Get the Timing Right Pruning a crape myrtle during the wrong time of year can cause more harm than good, even if your pruning technique is flawless. The ideal time to prune your crape myrtle is late winter or early spring, while the plant remains in a dormant growth phase. During this time, you can remove branches that are dead, damaged, diseased, or crossing one another. Early spring pruning is not always a promising approach for plants that bloom on old wood. However, since crape myrtles bloom on new growth, pruning in early spring does not risk removing the flowers that will bloom later that year. Use the Right Tools and Techniques Don’t prune your crape myrtle, or any other woody plant in your garden, unless your pruning tools are as sharp and sterile as can be. Tools you have cleaned well are less likely to spread disease to your crape myrtle. Likewise, sharp pruning tools make clean cuts that your tree can recover from quickly. Once you have the right tools in hand, the next step is to employ the proper pruning technique. To prune a crape myrtle, you should not shear it, trim it, or top it. Instead, you should remove individual branches selectively, cutting each one at the point where it meets a larger branch. Keep it Light Most novice gardeners tasked with pruning a crape myrtle fear harming this gorgeous plant beyond repair. However, this kind of crape murder usually occurs when you make the mistake of over-pruning your crape myrtle tree. Even if over-pruning is not fatal, it will likely detract from your crape myrtle’s overall form and can cause it to put forth weak new growth that will be prone to breakage. If you want to avoid crape murder, the best approach is to remove one stem or branch at a time using clean cuts. The branches you remove should also be on the smaller side. Generally, any branch that’s thinner than a pencil is safe to remove. Deadhead During Bloom Time Since a crape myrtle’s flowers are its most attractive feature, removing them seems counterintuitive. On the contrary, this pruning style, known as deadheading, can make your tree’s floral more impressive and long-lasting. Any significant structural pruning should take place in early spring. However, you can also remove spent flowers during the bloom period, which may encourage your crape myrtle to produce new blooms. With that said, this pruning style is optional, and some crape myrtle varieties will rebloom without any deadheading at all. Limb Up to Look Good As you may have noticed, the most attractive crape myrtles often have a few graceful main stems that support the canopy. However, that look does not come about on its own. Instead, creating an attractive multi-stemmed look requires strategic pruning. To achieve this look, start by removing all but three to five main stems while your crape myrtle is young. Each spring, remove any branch that emerges from the lower half or lower two-thirds of those main stems. This pruning approach allows your crape myrtle to show off a magnificent form for as long as it graces your garden. |
�
Categories
All
AuthorALL Outdoors will post educational articles, videos, and newsletters to help you learn about the lawn care, landscaping, and outdoor living world. Click Below to Follow Us on Facebook, Twitter, and Youtube. All Blogs are posted on our page as well.
Click Below to Receive Email Notification when a New Blog is Posted.
To Use the RSS Feed you must have a RSS Feed Reader App. The URL is www.alloutdoors-sc.com/1/feed
|
|
Service Area:
We proudly service Greenville, Greer, Taylors, Mauldin, Simpsonville, Five Forks, and surrounding Upstate cities in South Carolina for lawn care and landscaping services. Call us today at 864.275.2039 to see why we are the premier lawn and landscape company of the Upstate. |
Navigation
Request a Quote
Residential Services - Commercial Services FAQ - Testimonials - Career Home - About Us - Gallery - Client Login Terms of Service - Warranties |
Contact Information:

|


 RSS Feed